In the beginning you will know that you can open Windows 10 files using some other particular program. The way he does this is through file associations. So that an application or a file can be set as default, for some type of file in common.
It is for this reason that we will teach you to set default programs in this operating system. As well as you can change file associations in Windows 10. All this through several methods that we will show you below.
What is meant by Windows 10 file associations?
First, each file on your system is stored in a particular format. We have as an example, JPG image files and Microsoft Word DOC files.
Similarly, certain programs can only open certain specific files. To give you an example; A JPG image file cannot be opened in a word processor such as Microsoft Word. In this sense, it would open the image in something like the Windows 10 Photos application.
Instead of having to specify what program you want to use to open a file every time you access it. Windows assigns a default default program to each type of file. This user can change these default values, or a program could set the values once it is installed.
This is why it is sometimes necessary to adjust file type associations. Fortunately, this is easy to do. Let’s see how you can see what type your files are. And then, the different methods to change Windows 10 file associations.
How to know the type of file in the system?

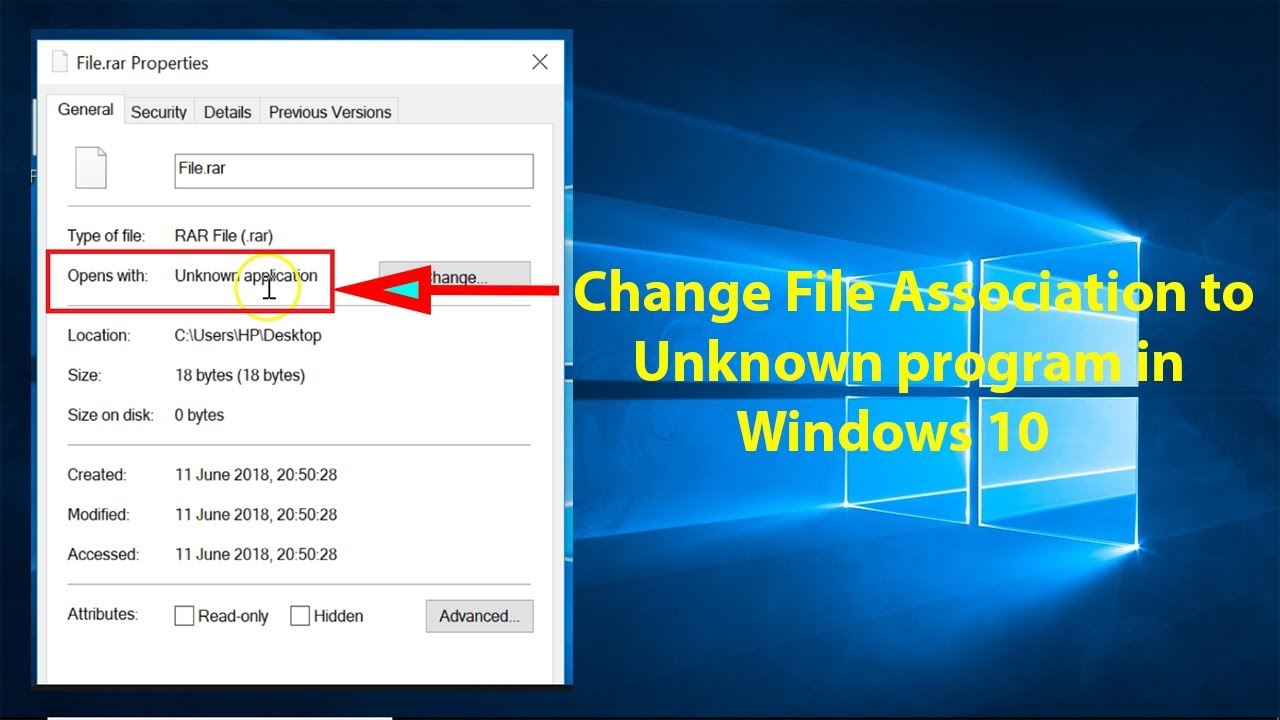
Before you can change file associations, you need to know what types of files you are storing on your PC. First, open File Explorer and go to the folder that contains the file in question. Then, right click on that file and select the Properties option.
In this way, a new window will open with details about that file. The file type will tell you what the extension is. Now, the “Open with” option will tell you in which program it can be opened.
In the same way, you can configure it so that the extension appears with the name of the file in the Explorer. To do this, you must open the File Explorer and click on the View tab. Then, check the box for «File name extensions».
How to change file type associations in Windows 10
In this sense, there are three very easy and fast methods within the Windows 10 operating system so that you can change file type associations.
1.- The option «Open with»
Generally, you can change file type associations directly from File Explorer. To do this, you just have to right-click on the file and then click “Open with.”
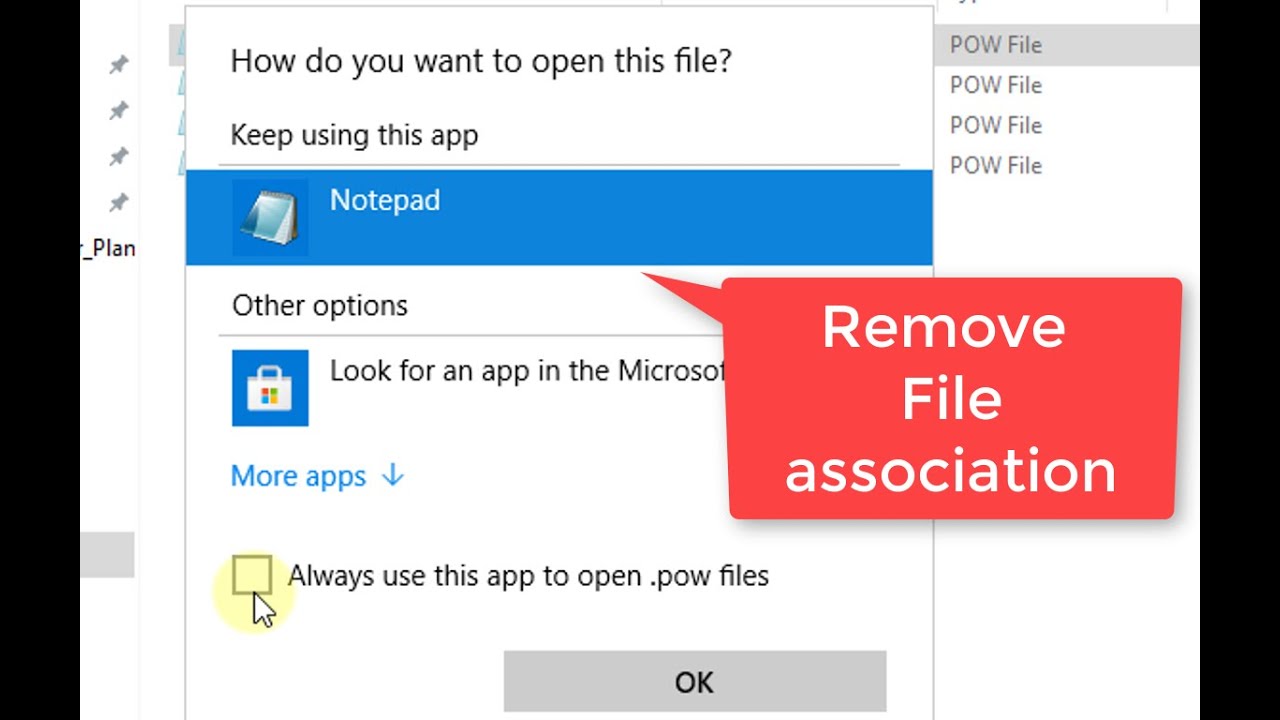
Immediately, you will see a list of programs that you can use to open the file. But this will only be once and will not change your settings permanently. Similarly, to make a permanent change, you must select the option “Choose another application”.
Now, select the application from the list you want to use to open the type of file you have chosen. If you don’t see the program you need, you have to scroll down and select the “More applications” option so you can get a wider selection.
If the program is not there yet, select «Search for another application on this PC». Now you can review the program files and locate the executable for the program you want.
When this program is selected, check the option “Always use this application to open .X files” at the bottom of the window. This will permanently change the association of the file type. Then, you just have to click OK.
2.- Establish default file associations in the configuration

The best place to completely change file associations and set default applications is through Settings. To start, press the Windows key I to open the Settings on your computer. Now, go to Applications and then go to Default Applications.
In this site you can configure and use default applications for things such as: email, maps, music, among others. Click on the application to select a different one from the list shown.
In the same way, you can click on “Reset”. This is to reset everything to the “default values recommended by Microsoft.” As expected, this means that the default Windows 10 Pro programs created by Microsoft will be reset as Groove Music for music and Edge for web browsing.
Now, go down and you will see three options to have better control over file associations, these options are:
1.- Default applications by file type.
2.- Choose default applications by protocol.
3.- Set default values per application.
The choice by file type allows you to configure specific programs for .JPG, .DOC, among many others. So this is the option you are probably needing.
At the same time, choosing by protocol is for actions or for links. For example, when finding a URL link: calculator; You can set which program is used. The vast majority of these programs will be quite application specific anyway. So it is rare that you should change them.
Finally, the configuration by application allows you to manage a complete program, its types of files and associated protocols from one place.
3.- Remove file associations at the command prompt (cmd)
If it is not possible to restore the file associations through the Configuration, for that, you must use the command prompt or cmd. First, press Start, type “cmd” and you will find the command prompt. Right click and then click on “Run as administrator”.
Now, type assoc, press the Enter key and all types of files and their associations will appear. To quickly verify a specific file type, enter the following command:
assoc .ext
Replace ext with the type of file you need. For example, enter assoc .jpg and you will see which program opens the JPG files.
To remove the association from the program, just type the following command:
assoc .ext =
Again, replace ext. You can type the first command to verify that it worked. Since you should see a “file association not found” error.
Backup and restore of Windows 10 file type associations
It is known that Windows 10 resets default applications by changing file type associations. All this after each update that Microsoft releases. The best thing you can do to solve this is to make a backup copy of your file type associations and restore them once you realize that a Windows 10 update was wrong with one of them.
Use of the default program editor
The easiest method to backup and restore file type associations is by using a third-party utility called Default Program Editor.
Once you download and install them, run it and click Create or restore a backup of the registry settings. Now, click on “Create a backup”. This will process and add an entry to the table with the date and time.
When it is time to restore, go back to the previous step, click on the entry and then click on Restore the selected backup. Finally, you must restart your PC.
You can use the registry
In the same way, you can go directly to the registry to make a backup copy of the file type associations. However, this method is a bit more complicated. And sometimes, it can cause a permission error when restoring certain associations. As such, you should use it as a last resort.
Now, you must press the Windows key R to open the Run application. Enter the word regedit and press the Enter key to start the Registry Editor. Now look for the following key. For this we give you the route:
HKEY_CURRENT_USER Software Microsoft Windows CurrentVersion Explorer FileExts
When you get it, right-click on FileExts or the subfolder you want. Now, select the Export option, choose a destination and a file name for the backup of your .reg file.
Once you need to restore this backup, right-click on the corresponding .reg file that you have previously saved and select the “Merge” option. This will overwrite the current settings in your registry and restore your previously backed preferences (if you have done so).
You can now have control over file associations
With the methods you just saw, you will have full control over your file type associations. Making sure all your files are opened in the most appropriate program by default. You should be careful when installing a new program, as some of them will request to become the default program for a set of file types, and you may not want to set this option.